
UPDATE : You can easily take and restore ownership of registry keys using RegOwnershipEx.Sometimes it becomes very necessary for a Windows user to take the ownership of a file in order to complete the work. Suppose you want to edit the default text for Charms Bar (
 + C).
+ C).All the settings of Charms Bar default text are stored in a file named twinui.dll.mui, which is placed under System32 folder of Windows drive.
Moving on, if you’ve finished tweaking this file with your customized strings using third party tool like Resource Hacker, then you need to replace the tweaked file with default one, to get the desired results. In that case, you have to take some special permissions from Windows to do that.
This phenomenon is called as “taking ownership”. By default Windows sets ownership and full permission control to TrustedInstaller. Now lets see how to take and restore ownership from this TrustedInstaller…
How to take ownership from TrustedInstaller?
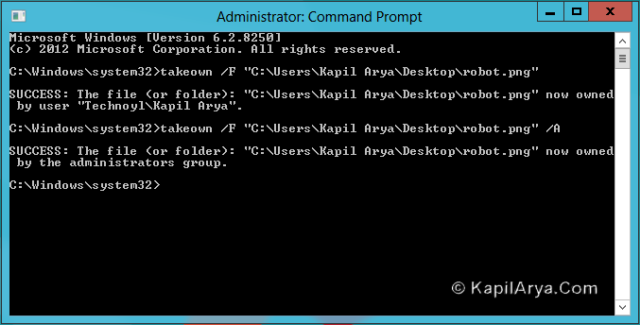
1. Open Command Prompt with administrative privileges.Using Elevated Command Prompt
2. Use following commands to take ownership:
For taking ownership of file for currently logged user : takeown /F “full path of file”
For taking ownership of file for group of administrator : takeown /F “full path of file” /A
For taking ownership of folder/drive for currently logged user : takeown /F “full path of folder/drive“ /R
For taking ownership of folder/drive for group of administrator : takeown /F “full path of folder/drive“ /A /R
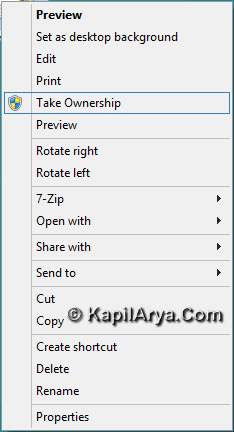
This is the simplest and safest bet to play for taking ownership. It will save you time and extra work. Just download them and run, that’s it.By Adding “Take Ownership” To Right Context Menu
To add the “Take Ownership”, download following registry and run it:
Download LinkTo remove “Take Ownership” from context menu, run following registry:
Download Link
If you are looking for taking ownership of a file or folder or drive manually, then here is the working way. Follow each step carefully.Taking Ownership Manually
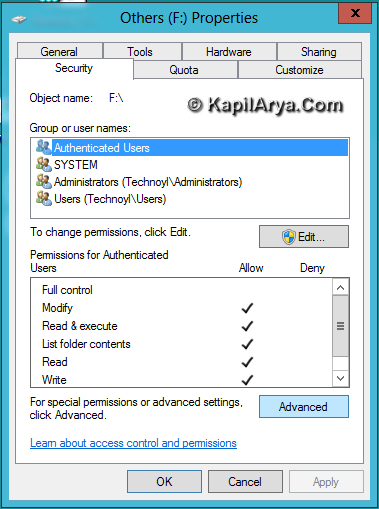
1. Right click on target object whose ownership you want to take. Pick Properties. Switch to Security tab.
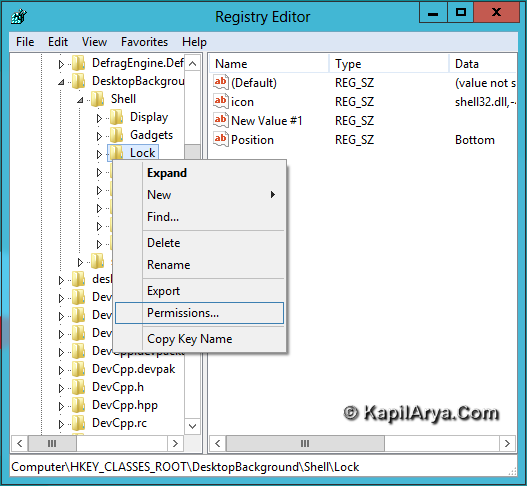
1.1 If you are looking for taking ownership of any registry key in Registry Editor, right click on that key and select Permissions. Now proceed as directed in next steps.
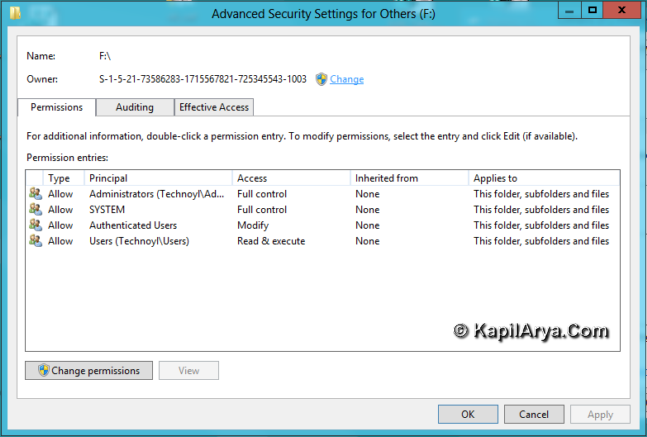
2. Obviously the default owner is TrustedInstaller. Click on Change in below window.
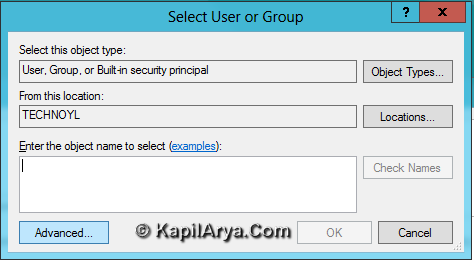
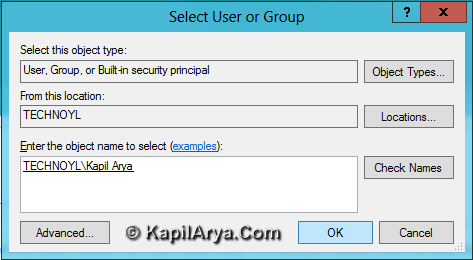
3. Then click Advanced in Select User or Group window.
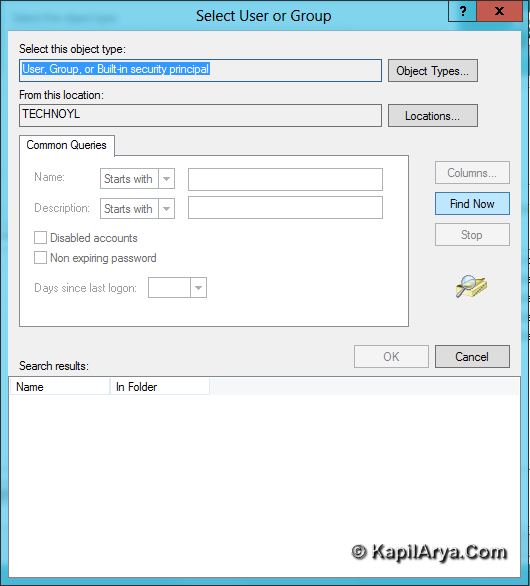
4. Previous step yields below shown window, click Find Now.
5. Now we have the search results here, pick your user name, click OK.
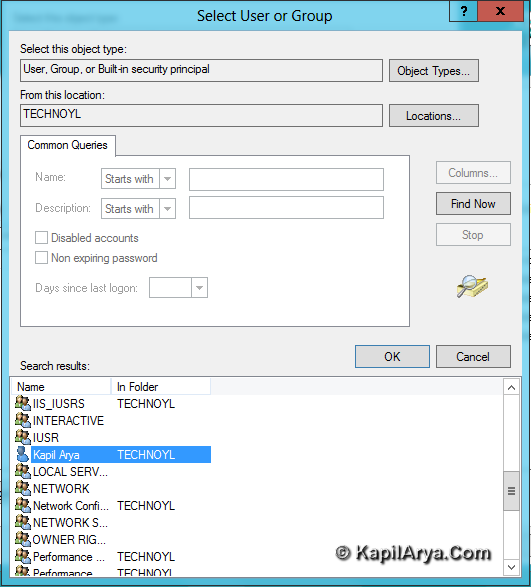
6. Then click OK in Select User or Group window as well.
7. Thus you have successfully changed the owner.
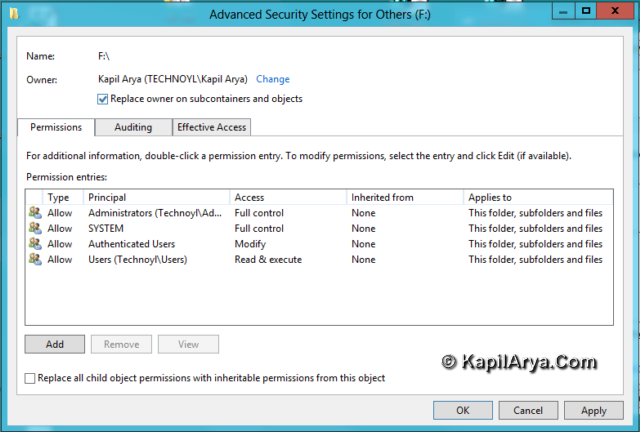
As you can see in above image, there is option for Replace owner on subcontainers and objects. If you uncheck it, you’ll get:
If you check this option, you and the correct owner who just has taken ownership will be able to grant access permission for that object. Press Yes, that’s it.
How to restore ownership to TrustedInstaller?
To remove yourself as owner of object and give its control to default owner, you need to restore ownership which you have taken earlier using any of above illustrated method. Use following registries to restore ownership.
You can add “Restore Ownership” to right click context menu by running following registry:
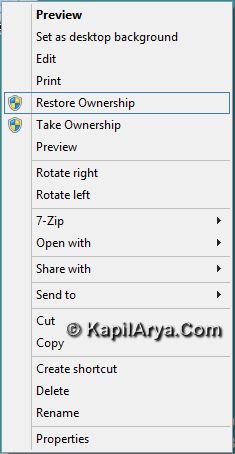
Add Restore Ownership option registryYou can remove “Restore Ownership” to right click context menu by running following registry:
Remove Restore Ownership option registryP.S. : Never bother to take ownership of Windows drive (C: Drive usually), it yields unstable OS and may result in serious causes to your installation.
Hope you like the article.. please drop your valuable queries so that we can help you….. :)
ABOUT TOYOTA PRODUCTION SYSTEM
BalasHapushttp://student.blog.dinus.ac.id/pujiamimutiara/2016/07/24/mengenal-sistem-produksi-toyota/
Your Affiliate Money Printing Machine is waiting -
BalasHapusAnd making money online using it is as easy as 1---2---3!
It's super easy how it works...
STEP 1. Input into the system which affiliate products the system will promote
STEP 2. Add PUSH BUTTON traffic (it LITERALLY takes 2 minutes)
STEP 3. See how the system explode your list and sell your affiliate products all for you!
Are you ready to start making money??
Get the full details here